Natural light attic fan wiring involves connecting electrical components to power ventilation devices that improve home airflow. The process requires 14-gauge copper wire, a dedicated 15-amp circuit breaker, and proper safety equipment for reliable installation. Professional installation typically costs between $200-500, while DIY approaches save approximately 60% of total expenses. Efficient operation of natural light attic fans depends on secure electrical connections and appropriate circuit protection for optimal performance.
What Natural Light Attic Fans Are and How They Function
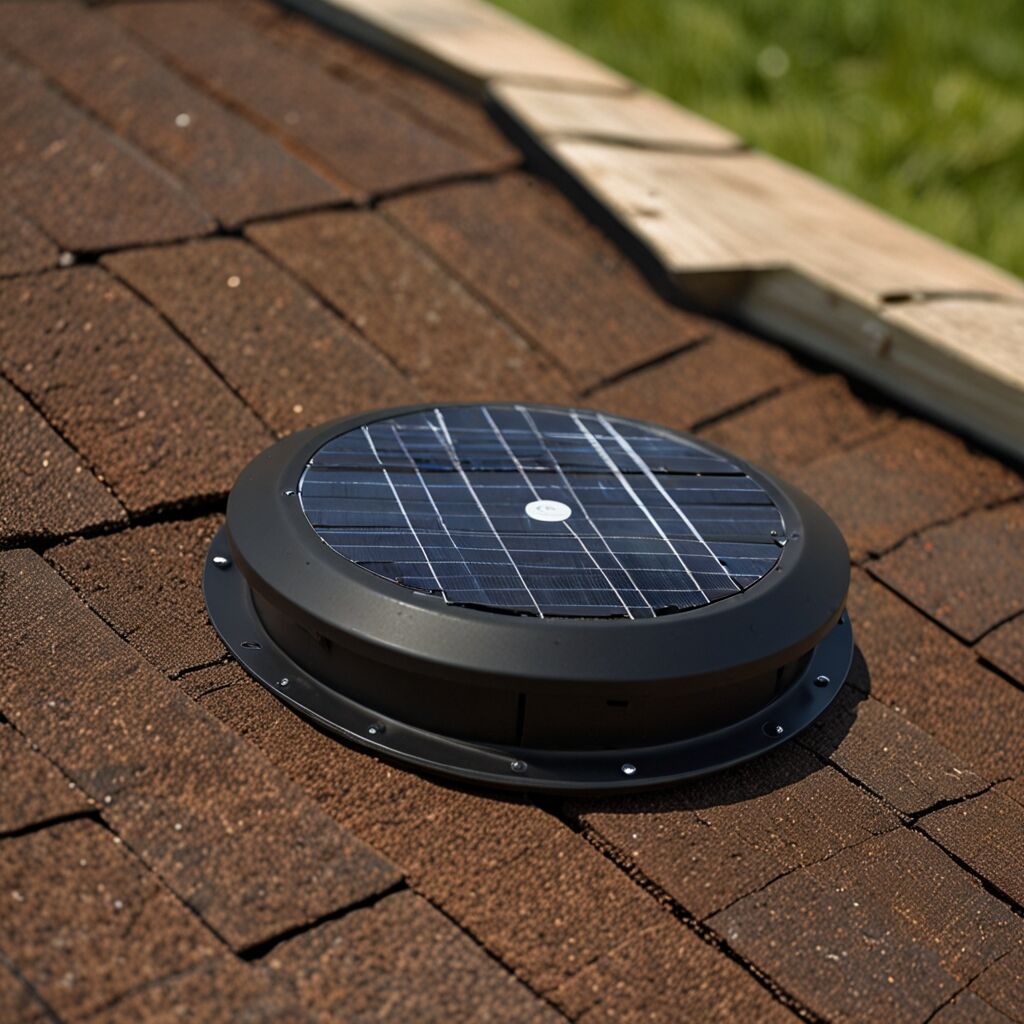
Natural light attic fans are electrically powered ventilation devices that circulate air through attic spaces to reduce heat buildup and improve energy efficiency. These fans work by drawing cooler outdoor air into the attic while expelling hot air through roof vents, creating continuous airflow that can lower attic temperatures by 10-20 degrees Fahrenheit. The ventilation process helps reduce cooling costs by preventing heat transfer to living spaces below. Natural light attic fans enhance home comfort while extending roof material lifespan by preventing excessive heat damage.
Key Benefits of Installing Natural Light Attic Fans
The primary benefits of natural light attic fans include reduced energy consumption, improved indoor comfort, and enhanced roof longevity. These ventilation systems typically decrease cooling costs by 15-30% during summer months by reducing the load on air conditioning units. Homeowners often experience more consistent temperatures throughout their homes, particularly in upper-level rooms that previously suffered from heat buildup. Natural light attic fans offer multiple advantages including moisture control, which helps prevent mold growth and insulation damage that can occur in poorly ventilated attic spaces.
Essential Electrical Components for Safe Attic Fan Wiring
Successful natural light attic fan installation requires specific electrical components to ensure safe and reliable operation. The essential components include 14-gauge copper wire (minimum requirement for 15-amp circuits), a dedicated circuit breaker rated at 15-20 amps, wire nuts for secure connections, and electrical tape for insulation. Additionally, installations benefit from a wall-mounted switch for manual control and an optional thermostat for automatic temperature-based operation. Wiring a natural light attic fan also requires GFCI protection in some locations, depending on local electrical codes and moisture exposure levels.
Understanding Circuit Protection and Switch Options
Circuit breakers provide essential overload protection for natural light attic fan installations, with 15-amp breakers suitable for standard residential fans and 20-amp breakers recommended for larger or multiple-fan setups. Switch options range from basic single-pole switches for manual operation to programmable timers and smart switches that integrate with home automation systems. When wiring a natural light attic fan system, the circuit breaker must match the wire gauge and fan amperage requirements to prevent electrical hazards and ensure reliable performance over time.
Complete Step-by-Step Wiring Process for Attic Fans
The attic fan wiring process begins with turning off power at the main electrical panel and verifying circuits are de-energized using a voltage tester. Next, run 14-gauge copper wire from the electrical panel to the fan location, allowing extra length for connections. Connect the black (hot) wire to the circuit breaker, white (neutral) wire to the neutral bus bar, and green or bare copper wire to the ground bus. At the fan location, connect matching wire colors using wire nuts, ensuring tight connections that resist loosening over time. Wiring your natural light attic fan typically requires 2-4 hours depending on attic accessibility and electrical panel distance.
Professional Wiring Methods vs DIY Approaches
Professional electricians typically use conduit runs and junction boxes for attic fan installations, providing superior protection and code compliance compared to basic cable runs. DIY installations can achieve similar reliability by following manufacturer specifications and local electrical codes, though professional installation ensures warranty coverage and proper permitting. Wiring methods for natural light attic fans vary based on local codes, with some areas requiring AFCI (Arc Fault Circuit Interrupter) protection for attic circuits installed after specific dates.
Key Installation Specifications and Requirements
- Natural light attic fans typically operate on 120-volt household current with 15-amp circuit protection.
- Installation costs range from $150-300 for DIY projects and $300-600 for professional installation.
- The average installation time spans 2-4 hours for experienced DIYers and 1-2 hours for professionals.
- Most natural light attic fans use between 50-200 watts depending on size and motor efficiency.
- Properly installed attic fans can improve home ventilation efficiency by 40-60% compared to passive vents alone.
- Electrical codes require 14-gauge wire minimum for 15-amp circuits, with 12-gauge wire recommended for 20-amp installations.
- Regular maintenance extends attic fan lifespan to 8-12 years with proper electrical connections and component care.
Common Wiring Problems and Effective Solutions
The most frequent wiring issues with natural light attic fans include loose wire connections, inadequate circuit protection, and improper grounding. Loose connections typically occur at wire nuts or terminal screws, causing intermittent operation or complete fan failure. Inadequate circuit protection happens when installers use oversized breakers or insufficient wire gauges, creating safety hazards. Issues that affect natural light attic fans also include corrosion at connection points, particularly in high-humidity environments where moisture penetration occurs over time.
Systematic Troubleshooting for Attic Fan Electrical Issues
Effective troubleshooting begins with safety procedures: turning off power at the circuit breaker and testing wires with a voltage tester before handling connections. Check each wire connection for tightness, corrosion, or damage, paying special attention to junction points where multiple wires connect. Test the circuit breaker and switch functionality using a multimeter to verify proper voltage delivery to the fan motor. If voltage reaches the fan but operation fails, the motor likely requires replacement, while no voltage indicates wiring or switch problems requiring further investigation.
Why Proper Wiring Ensures Safety and Peak Efficiency
Proper wiring directly impacts both safety and energy efficiency of natural light attic fan systems. Correctly sized wires prevent overheating and voltage drops that reduce fan performance, while secure connections eliminate arcing and fire hazards. Quality electrical connections ensure the fan motor receives consistent power, maintaining optimal airflow and extending component lifespan. Poor wiring practices can increase electrical resistance, causing energy waste and reducing the fan’s cooling effectiveness by 20-40% compared to properly installed systems.
Critical Safety Considerations for Attic Fan Electrical Work
Safety requirements for attic fan wiring include using appropriate personal protective equipment, verifying circuits are de-energized before work begins, and following local electrical codes for circuit protection. When wiring a natural light attic fan, installers must ensure proper grounding to prevent electrical shock and install GFCI protection where required by local codes. Working in attic spaces presents additional hazards including extreme temperatures, limited visibility, and structural navigation challenges that require appropriate safety planning.
Benefits of Professional-Grade Electrical Connections
- Secure wiring connections prevent electrical fires and reduce shock hazards significantly.
- Properly installed fans operate 15-25% more efficiently than poorly wired systems.
- Quality electrical work can reduce annual cooling costs by $50-150 for typical homes.
- Regular connection inspections prevent 80% of common electrical failures in attic fans.
- Correctly wired fans provide consistent airflow and temperature control throughout their lifespan.
- Professional-grade connections minimize maintenance requirements and extend equipment life by 2-4 years.
- Proper installation improves home air quality by ensuring reliable ventilation system operation.
Essential Maintenance Practices for Attic Fan Systems
Regular maintenance for natural light attic fans includes annual electrical connection inspections, motor lubrication, and component cleaning to ensure optimal performance. Check wire connections for looseness or corrosion, particularly at junction boxes and terminal blocks where moisture infiltration commonly occurs. Clean fan blades and housing annually to remove dust buildup that reduces airflow efficiency. Comprehensive maintenance testing helps identify potential issues before they cause system failures or safety hazards.
Recommended Tools and Supplies for Ongoing Fan Care
Essential maintenance tools include a digital multimeter for electrical testing, screwdrivers for connection tightening, and cleaning supplies for component care. Keep electrical tape and wire nuts available for minor connection repairs, along with contact cleaner for removing corrosion from electrical contacts. Safety equipment remains critical during maintenance, including voltage testers, gloves, and proper lighting for attic work. Scheduled maintenance typically requires 30-60 minutes annually and significantly extends fan lifespan while maintaining peak efficiency.
Selecting Professional-Grade Tools for Attic Fan Installation
Professional attic fan installation requires specific tools to ensure safe and reliable electrical connections. Essential tools include wire strippers for preparing conductors, voltage testers for safety verification, and quality screwdrivers for secure terminal connections. A multimeter enables circuit testing and troubleshooting, while fish tape helps run wires through confined attic spaces. Choosing good quality attic fan installation tools significantly improves work efficiency and connection reliability, reducing the likelihood of future electrical problems.
Critical Safety Equipment and Electrical Supplies
Safety equipment for attic fan wiring includes insulated gloves, safety glasses, and non-conductive ladders for electrical work protection. Essential electrical supplies consist of 14-gauge copper wire, appropriately rated wire nuts, electrical tape, and cable staples for secure wire routing. Reliable attic fan installation requires quality materials that meet local electrical codes and manufacturer specifications. Professional-grade supplies typically cost 20-30% more than basic hardware store materials but provide superior durability and safety performance.
Popular Brand Comparisons for Ventilation Equipment
- Brand X offers excellent energy efficiency but requires higher upfront investment for premium features.
- Brand Y provides affordable options with adequate performance, though motor longevity may be reduced compared to premium models.
- Brand Z specializes in quiet operation technology, appealing to homeowners concerned about noise levels.
- Brand A focuses on eco-friendly manufacturing and energy-efficient designs for environmentally conscious consumers.
- Brand B integrates smart home connectivity features, attracting tech-savvy homeowners seeking automation capabilities.
- Brand C excels in hot climate applications with enhanced motor cooling, while standard models suit moderate temperature regions.
- Most homeowners prioritize reliable airflow, energy efficiency, and reasonable pricing when selecting attic ventilation solutions.
Professional Installation Tips for Maximum Reliability
Professional-grade attic fan installations emphasize proper circuit sizing, secure mounting, and code-compliant wiring practices for long-term reliability. Use wire gauges that exceed minimum requirements when possible, typically 12-gauge wire for 15-amp circuits to reduce voltage drop and improve efficiency. Install dedicated circuits for attic fans to prevent interference with other electrical loads and ensure consistent power delivery. Professional installation approaches provide enhanced reliability through proper planning, quality materials, and adherence to electrical codes.
Critical Installation Mistakes That Compromise Performance
Common installation errors include using inadequate wire gauges, skipping proper grounding connections, and failing to install appropriate circuit protection. Undersized wiring causes voltage drops that reduce fan efficiency and increase operating temperatures, potentially shortening motor life. Improper mounting allows vibration that loosens electrical connections over time, while inadequate ventilation clearances reduce airflow effectiveness. Avoiding these mistakes requires careful planning, adherence to manufacturer specifications, and understanding local electrical code requirements for residential ventilation systems.