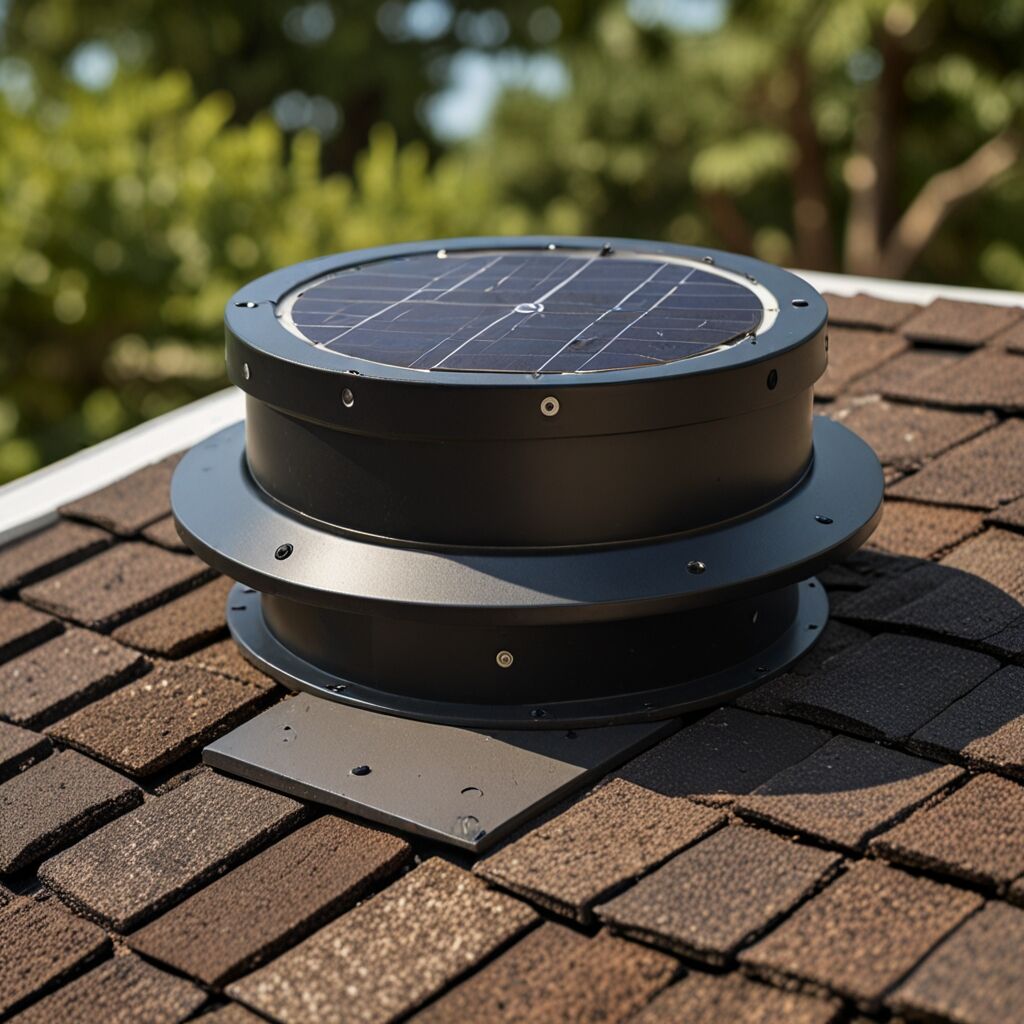
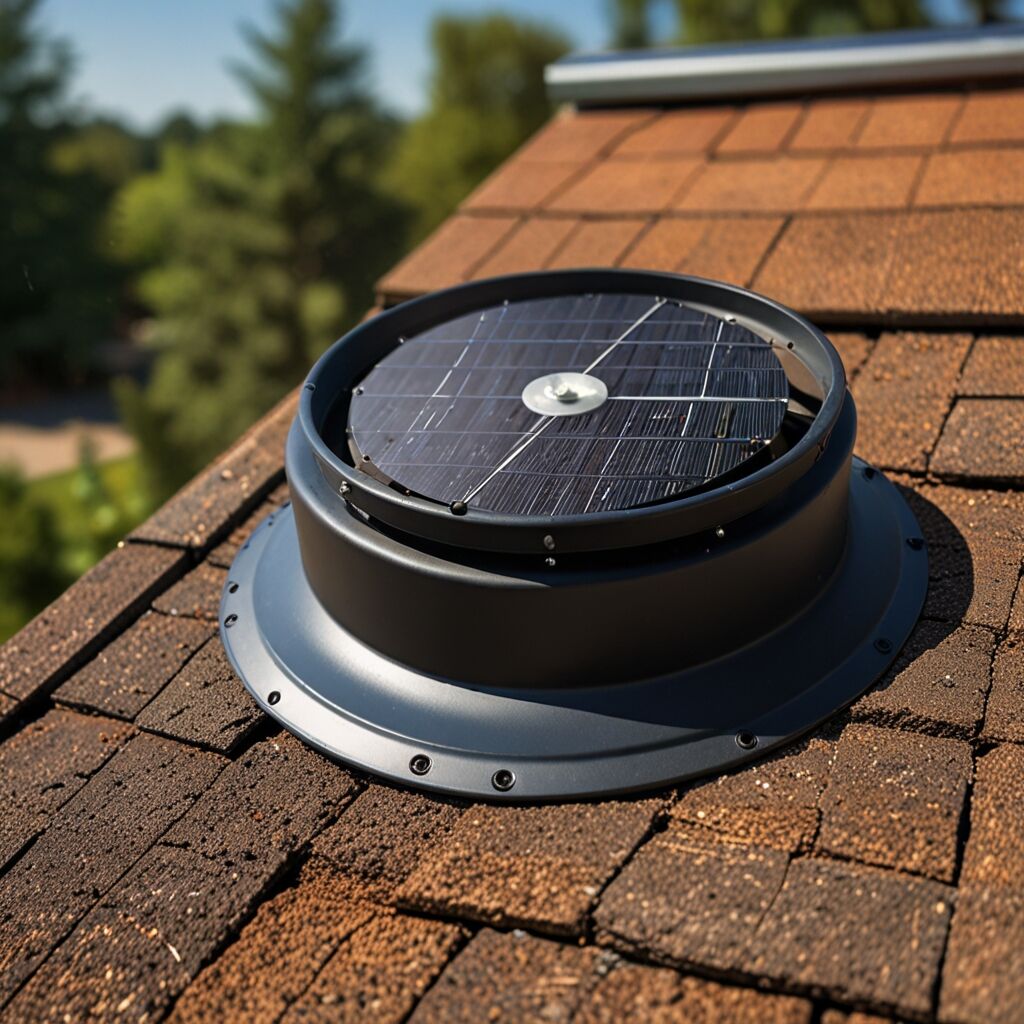
Gable solar attic fan flashing is a waterproof barrier that seals the junction between your roof and attic fan, preventing water infiltration and structural damage. Proper flashing installation typically takes 2-3 hours and costs between $50-150 in materials, protecting your home from thousands in potential water damage while ensuring optimal fan performance and energy efficiency for years to come.
What Are Gable Solar Attic Fans and Why Flashing Matters
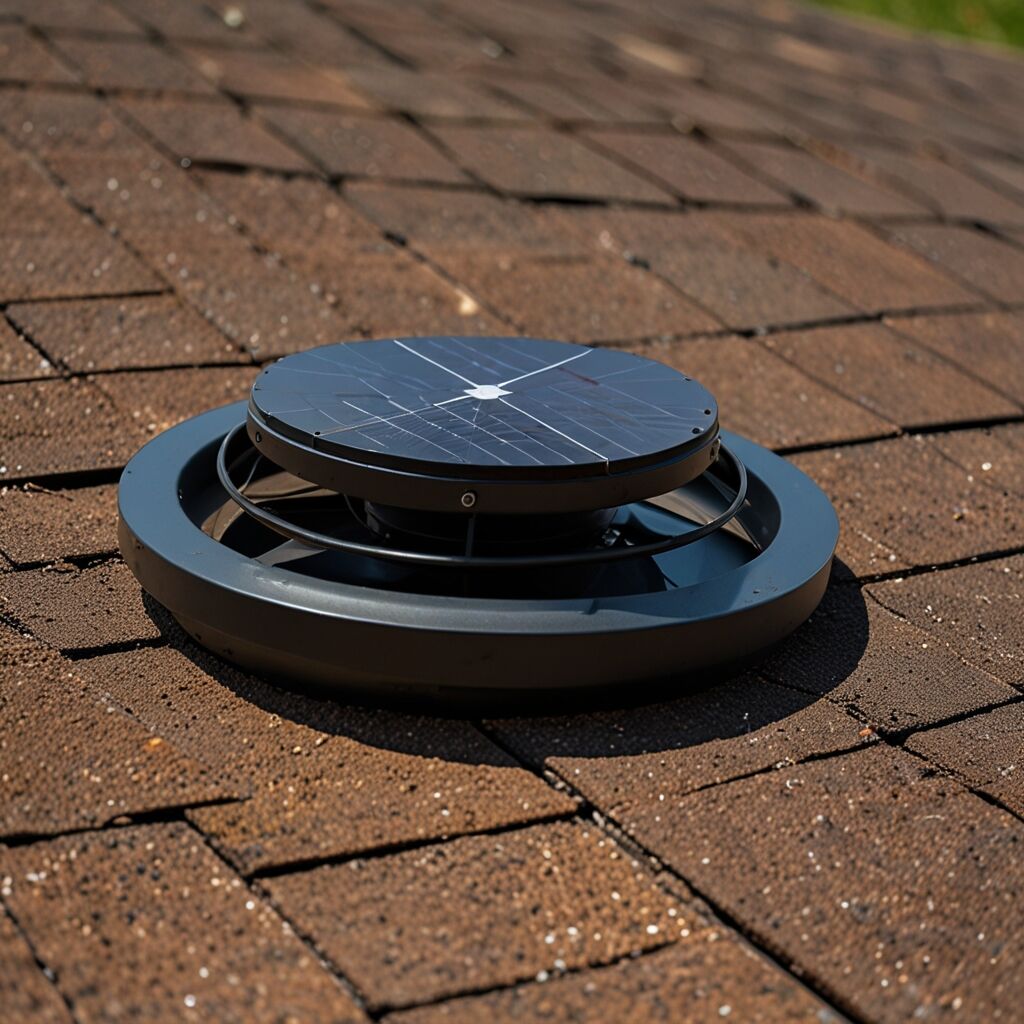
Gable solar attic fans are ventilation systems mounted on exterior gable walls that use solar power to exhaust hot air from attics. These fans typically move 500-1200 cubic feet of air per minute, reducing attic temperatures by 20-40 degrees and lowering cooling costs by 10-30%. The flashing component serves as the critical waterproof seal around the fan mounting point, directing water away from the roof penetration. Without proper flashing, even the best solar attic fan becomes vulnerable to water intrusion, which can cause ceiling stains, insulation damage, and mold growth. Quality gable fan installations require both the right equipment and proper sealing techniques to deliver reliable performance and long-term durability.
How Gable Solar Attic Fans Reduce Energy Costs and Improve Comfort
Gable solar attic fans enhance energy efficiency by creating continuous air circulation that removes trapped heat from attic spaces. During summer months, unventilated attics can reach temperatures exceeding 150°F, forcing air conditioning systems to work harder and increasing energy bills. Solar-powered gable fans operate automatically when sunlight hits their panels, providing ventilation precisely when it’s needed most. Homeowners typically see cooling cost reductions of 15-25% after installation, with payback periods ranging from 2-4 years depending on local climate and electricity rates. The improved air circulation also reduces humidity levels, preventing moisture-related problems like condensation buildup and extending the life of roofing materials and insulation.
Understanding Flashing Types and Water Protection Systems
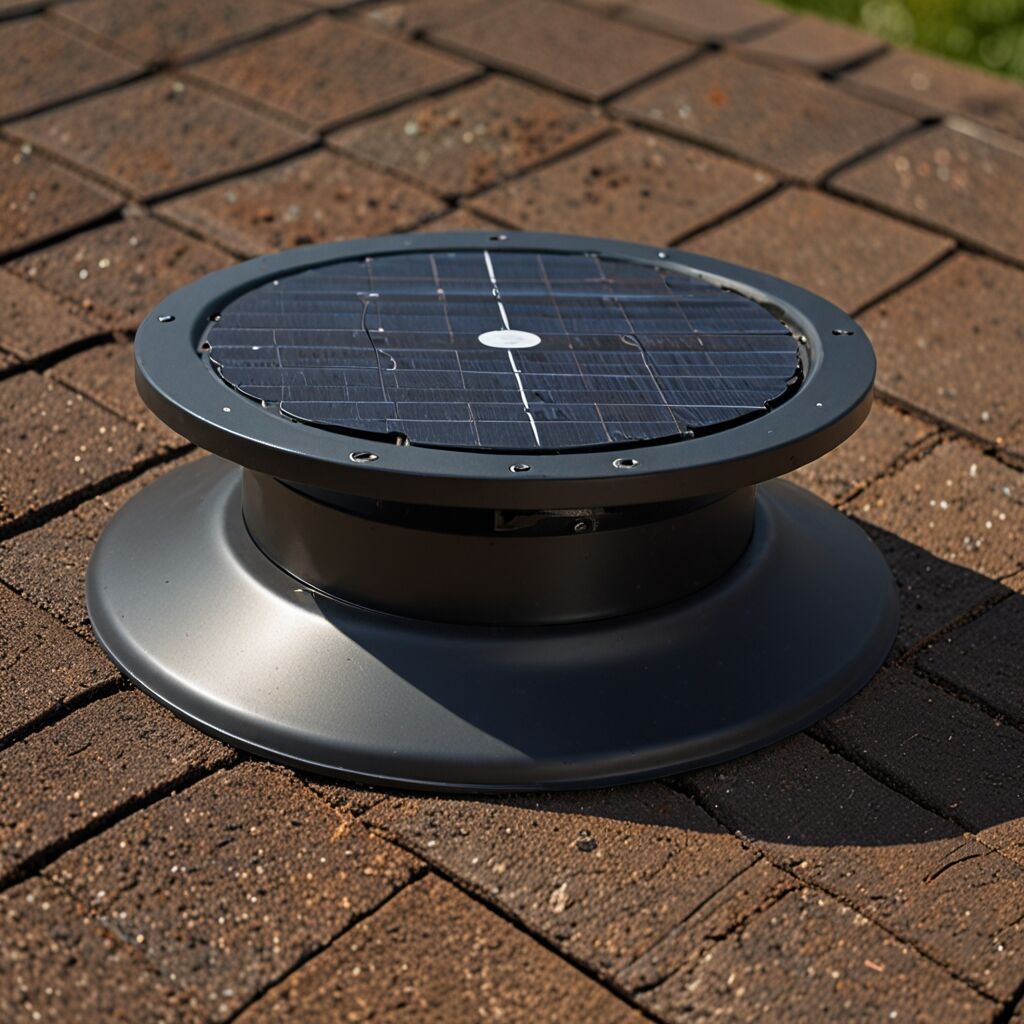
Flashing serves as the primary defense against water infiltration at roof penetrations, creating multiple layers of protection around gable solar attic fan installations. Step flashing works with roofing materials like shingles to create overlapping water barriers, while base flashing provides the foundation seal around the fan housing. Counter flashing acts as the top layer, shedding water away from seams and joints. Quality flashing materials include aluminum, copper, and rubber membrane systems, each offering different durability levels and installation requirements. Proper flashing installation prevents the most common cause of attic fan failures – water damage to electrical components and motor housings. Understanding warranty requirements helps ensure your installation meets manufacturer specifications for long-term protection.
Material Selection for Long-Term Leak Prevention
Choosing appropriate flashing materials depends on your roof type, local climate, and budget considerations. Aluminum flashing costs between $15-30 per installation and offers good corrosion resistance for most climates. Copper flashing, while more expensive at $40-75 per project, provides superior longevity and naturally develops a protective patina over time. Rubber membrane flashing systems range from $25-50 and work well with metal roofing or in areas with extreme temperature fluctuations. Each material requires specific installation techniques and compatible sealants to ensure proper adhesion and weather resistance. Professional installers often recommend matching flashing materials to existing roof components for optimal performance and aesthetic consistency.
Step-by-Step Flashing Installation Process
Installing flashing for your solar attic fan requires careful preparation and attention to weatherproofing details. Begin by gathering essential tools including a utility knife, drill with bits, level, measuring tape, and caulk gun. Materials needed include flashing kit, roofing screws, weather-resistant sealant, and safety equipment. The installation process involves five critical steps: positioning the fan housing, cutting flashing to fit, securing base layers, applying sealant, and testing the seal. Most homeowners with basic DIY skills can complete installation in 2-3 hours, while complex roof configurations may require professional assistance. Proper technique ensures your solar attic fan operates efficiently while maintaining complete weather protection.
Essential Tools and Safety Requirements
Successful flashing installation requires the right tools and safety precautions to ensure both quality results and personal protection. Essential tools include a sharp utility knife for cutting flashing materials, variable-speed drill for creating pilot holes, 4-foot level for ensuring proper alignment, and quality caulk gun for applying sealants. Safety equipment includes non-slip shoes, safety glasses, work gloves, and a sturdy ladder rated for your weight plus materials. Installing gable solar attic fans safely also requires checking weather conditions – never attempt roof work during wet, windy, or icy conditions. Having a helper available provides additional safety and makes material handling much easier during the installation process.
Critical Installation Steps for Water-Tight Sealing
- Mark and cut the gable wall opening using manufacturer’s template specifications
- Install base flashing layer with 2-inch overlap on all sides for complete coverage
- Position fan housing ensuring level placement and proper electrical connections
- Apply step flashing around housing perimeter, working from bottom to top
- Secure all components with appropriate fasteners spaced every 6-8 inches
- Apply continuous bead of high-quality exterior sealant along all seams
- Test installation with garden hose spray to verify water-tight seal
Material Costs and Professional vs DIY Installation
Material costs for gable solar attic fan flashing typically range from $50-150 depending on quality level and installation complexity. Basic aluminum flashing kits cost $40-80, while premium copper or rubber membrane systems range from $75-150. Additional materials include roofing screws ($10-15), premium exterior sealant ($15-25), and safety equipment if not already owned ($50-100). DIY installation saves $200-400 in labor costs but requires 4-6 hours of work and assumes you have necessary skills and tools. Professional installation costs $300-600 total, including materials and labor, with the advantage of warranty coverage and guaranteed leak-free performance. Consider professional installation for complex roof designs, steep pitches, or if you lack confidence working at heights.
When Professional Installation Makes Financial Sense
Professional installation becomes cost-effective when considering long-term risks and warranty protection. Licensed contractors provide installation warranties typically lasting 2-3 years, covering both materials and labor if leaks develop. Professional installers have specialized tools like pneumatic nailers and professional-grade sealants that ensure superior results. Comparing installation methods helps determine the best approach for your situation. Homeowners with limited roof experience, steep-pitched roofs (over 6:12 slope), or complex gable designs should strongly consider professional installation to avoid costly mistakes and ensure optimal performance.
Avoiding Common Installation Mistakes That Cause Leaks
Common mistakes during gable solar attic fan flashing installation include inadequate overlap, improper fastener placement, and insufficient sealing around penetrations. Inadequate overlap occurs when flashing pieces don’t extend at least 2 inches beyond adjacent materials, creating potential leak points. Improper fastener placement, such as driving screws through the center of flashing rather than edges, can create new penetration points for water entry. Insufficient sealing happens when installers skip applying sealant to all joints or use inferior products that fail within months. These mistakes account for over 80% of attic fan leak problems and can typically be prevented with proper planning and attention to manufacturer specifications.
Quality Control and Testing Your Installation
Testing your flashing installation ensures long-term reliability and identifies potential problems before they cause damage. Begin testing 24 hours after installation to allow sealants to cure properly. Use a garden hose to simulate rainfall, starting with light spray and gradually increasing water volume while checking interior areas for leaks. Testing your gable solar attic fan installation should include checking electrical connections, verifying proper fan operation, and confirming that water drains away from the housing. Any signs of water penetration require immediate attention – small leaks typically worsen quickly and can cause extensive damage if left uncorrected.
Benefits of Professional-Grade Installation Techniques
- Double-layered flashing systems provide redundant water protection
- Proper fastener selection prevents thermal expansion problems
- Premium sealants maintain flexibility through temperature cycles
- Correct overlap measurements eliminate potential leak paths
- Professional tools ensure consistent application and superior results
- Warranty protection covers both materials and installation workmanship
- Long-term performance reduces maintenance costs and extends equipment life
Positioning Flashing for Maximum Weather Protection
Optimal flashing placement depends on roof pitch, prevailing weather patterns, and gable wall construction details. Installing solar attic fan flashing requires positioning the bottom edge at least 6 inches below the fan housing to intercept water running down the gable wall. Side flashing should extend 4-6 inches beyond the fan housing on each side, with proper overlap at corners to prevent water infiltration. Top flashing must extend upward at least 8 inches and integrate with existing wall flashing or siding to create a continuous moisture barrier. Roof pitch affects water velocity – steeper roofs require wider flashing coverage to handle faster water flow during heavy rainfall.
Climate Considerations for Flashing Design
Different climate zones require specific flashing strategies to handle local weather challenges effectively. High-wind areas need additional fasteners spaced every 4-6 inches instead of standard 8-inch spacing to prevent flashing lift-off. Solar attic fans in regions with frequent freeze-thaw cycles benefit from flexible rubber membrane flashing that accommodates thermal expansion without cracking. Desert climates with intense UV exposure require flashing materials with superior fade resistance and thermal stability. Coastal areas need corrosion-resistant materials like copper or marine-grade aluminum to withstand salt air exposure. Understanding your local climate helps select appropriate materials and installation techniques for long-term reliability.
When to Replace or Upgrade Your Attic Fan System
Several indicators suggest your gable attic fan needs replacement or flashing upgrade. Visible water stains on interior walls or ceilings near the fan location indicate flashing failure requiring immediate attention. Excessive noise during operation often signals worn bearings or motor problems that compromise fan efficiency. Reduced airflow, noticeable as insufficient attic cooling, may indicate motor failure or blocked ventilation paths. Rust, corrosion, or physical damage to flashing materials typically occurs after 10-15 years and necessitates replacement to maintain weather protection. Modern solar attic fans offer improved efficiency and quieter operation compared to units installed more than 8-10 years ago, making upgrades financially attractive for many homeowners.
Upgrade Benefits and Technology Improvements
Modern gable solar attic fans incorporate advanced technologies that provide superior performance compared to older models. Brushless DC motors operate quieter and last longer than traditional brushed motors while providing consistent airflow across varying weather conditions. Improved solar panel efficiency means fans operate effectively even during partly cloudy conditions. Understanding the advantages and limitations helps homeowners make informed upgrade decisions based on their specific needs and budget. Advanced flashing systems now include integrated drainage channels and improved sealant technologies that provide better long-term weather protection with reduced maintenance requirements.
Cost-Benefit Analysis for Different User Groups
- New homeowners benefit from immediate energy savings and property value increase
- Environmentally conscious buyers appreciate reduced carbon footprint and renewable energy use
- Budget-focused households see quick payback through lower cooling bills and maintenance costs
- DIY enthusiasts gain satisfaction from successful installation while building valuable skills
- Professional contractors offer reliable installation with warranty protection and ongoing support
- Property managers reduce tenant complaints and maintenance calls with improved attic ventilation
- Energy-conscious families achieve substantial cooling cost reductions during peak summer months
Who Should Install Solar Attic Fans and Flashing Systems
Multiple groups benefit significantly from proper gable solar attic fan and flashing installation. Homeowners in hot climates see the greatest energy savings, with cooling cost reductions of 20-40% during summer months. Finding the right application depends on your specific situation, home size, and local climate conditions. Environmentally conscious households appreciate using renewable solar energy to improve home comfort while reducing carbon footprint. Property investors find solar attic fans increase home value and marketability while reducing ongoing maintenance costs. Older homes with inadequate ventilation benefit most from retrofitting, as improved airflow extends roof life and prevents moisture-related problems. Even renters can benefit when landlords install these systems, enjoying improved comfort and lower utility bills.
Long-Term Financial Benefits and Return on Investment
Solar attic fans with proper flashing installation typically provide complete cost recovery within 3-5 years through reduced energy bills and maintenance savings. Initial investment ranges from $300-800 depending on fan size and installation complexity, while annual energy savings average $150-400 based on home size and local electricity rates. Proper solar attic fan installation prevents costly water damage repairs that can exceed $2,000-5,000 if moisture infiltration occurs. Additional benefits include extended roof material life, improved indoor air quality, and increased home resale value. Quality installations with professional-grade flashing systems operate reliably for 15-20 years, providing decades of energy savings and comfort improvements that far exceed initial costs.