Attic solar fan weather seals are specialized materials that create airtight barriers around ventilation equipment, preventing unwanted air leakage that can increase energy costs by up to 30%. These seals work by closing gaps between attic solar fan weather seals and mounting surfaces, stopping conditioned air from escaping through cracks. Hevan.net provides research-backed guidance on selecting effective sealing solutions that enhance home comfort while reducing utility bills.
Understanding Air Leakage and Its Impact on Home Energy Efficiency
Air leakage refers to the uncontrolled movement of indoor and outdoor air through unintended openings in your home’s envelope. Common sources include gaps around windows, door frames, electrical outlets, and attic penetrations where pipes or wires pass through. This unwanted airflow forces your heating and cooling systems to work harder, typically increasing energy costs by 20-40% depending on your home’s age and construction quality.
How Air Leakage Affects Your Home’s Performance
Unsealed gaps in attics create several problems beyond higher energy bills. Temperature inconsistencies throughout your home occur when conditioned air escapes and outside air infiltrates living spaces. Moisture problems develop when humid outdoor air enters through leaks, potentially causing mold growth and structural damage. Indoor air quality suffers as outdoor pollutants, allergens, and dust bypass your HVAC system’s filtration. Addressing these leaks through proper sealing techniques can improve comfort while reducing the workload on your heating and cooling equipment.
What Are Attic Solar Fans and How Do Weather Seals Work
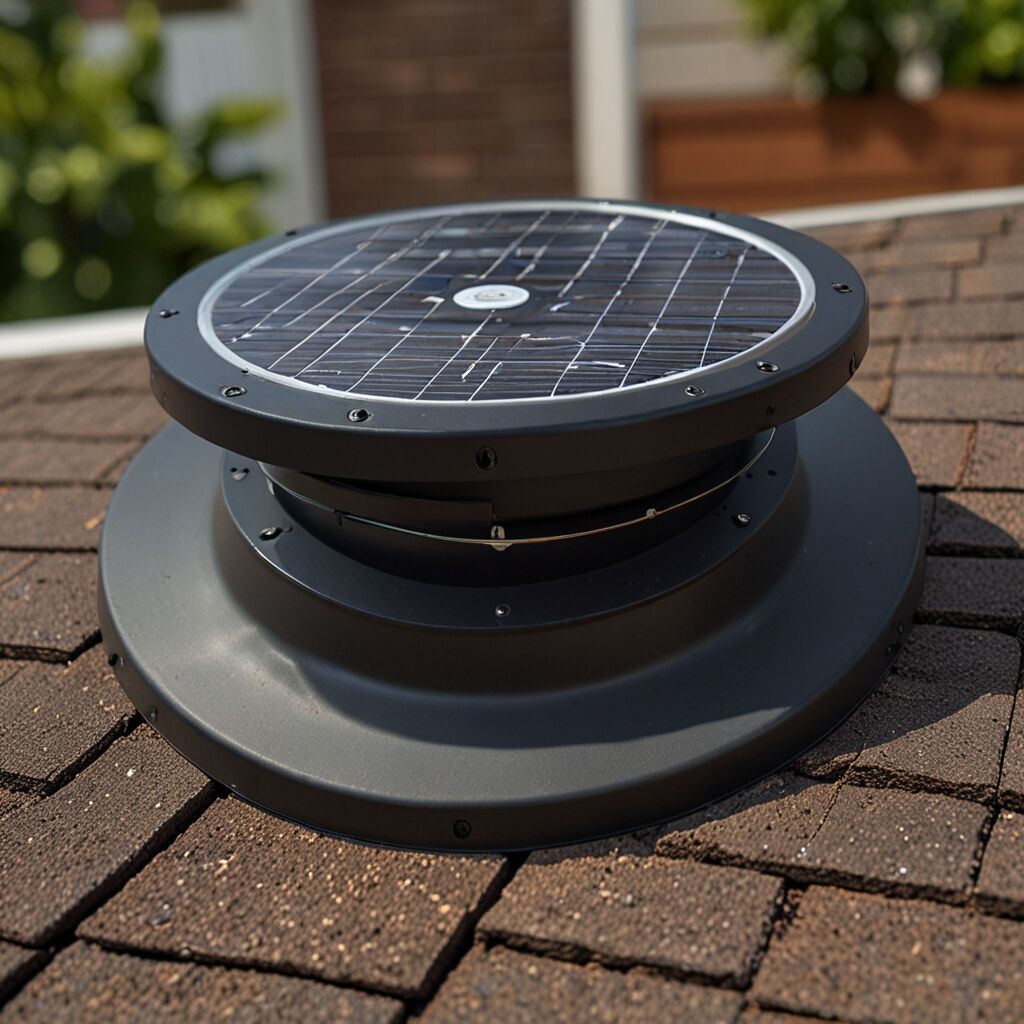
Attic solar fans are ventilation devices that use photovoltaic panels to power exhaust fans, removing hot air from attic spaces without requiring electrical connections. These fans typically move between 500-1,200 cubic feet of air per minute, depending on their size and solar panel capacity. Weather seals are flexible materials made from rubber, silicone, or foam that compress against surfaces to create airtight barriers around the fan housing and mounting points.
The Relationship Between Solar Fans and Weather Sealing
Weather seals enhance solar fan effectiveness by preventing air from bypassing the intended ventilation path. Without proper sealing, conditioned air from your living space can leak into the attic and be exhausted by the fan, wasting energy. Quality seals ensure that only hot attic air is removed while maintaining the thermal barrier between your conditioned space and the attic. This coordination between attic solar fans and weather sealing systems maximizes energy savings and maintains consistent indoor temperatures.
How Attic Solar Fan Weather Seals Prevent Air Leakage
Weather seals work by creating continuous barriers that block air movement through gaps and cracks around solar fan installations. These seals compress when the fan housing is mounted, forming weatherproof connections that maintain their effectiveness across seasonal temperature changes. The sealing process involves multiple contact points: between the fan base and roof surface, around mounting bolts, and along the fan housing perimeter.
Key Sealing Mechanisms That Stop Air Infiltration
Compression sealing occurs when rubber or foam materials squeeze against surfaces, eliminating air pathways through molecular-level contact. Adhesive sealing uses specialized tapes or caulks that bond permanently to create long-lasting barriers. Mechanical sealing employs gaskets and flanges that maintain pressure through hardware compression. These mechanisms work together to prevent both air leakage and water infiltration, ensuring your attic ventilation system operates efficiently while protecting your home’s structure from moisture damage.
Performance Metrics for Effective Air Sealing
- Properly sealed attics reduce air leakage by 15-25% compared to unsealed installations
- Quality weather seals maintain effectiveness across temperature ranges from -40°F to 180°F
- Professional installations typically achieve air leakage rates below 3 air changes per hour
- Sealed solar fan systems last 15-20 years compared to 8-12 years for unsealed units
- Energy savings from proper sealing range from $200-600 annually depending on home size
- Installation time for comprehensive weather sealing typically requires 2-4 hours
- Maintenance inspections should occur every 3-5 years to ensure continued effectiveness
Benefits of Installing Weather Seals with Attic Solar Fans
Weather seals provide multiple advantages that extend beyond simple air leakage prevention. Energy efficiency improvements typically range from 15-30% when seals are properly installed around solar fan systems. Indoor comfort increases as temperature variations between rooms decrease and drafts are eliminated. Air quality benefits occur when outdoor pollutants, dust, and allergens are prevented from entering through unsealed gaps around ventilation equipment.
Cost Savings and Performance Benefits
The financial benefits of weather sealing justify the investment through reduced utility bills and extended equipment life. Homeowners typically see payback periods of 2-4 years through energy savings alone. Properly sealed installations also prevent pest infiltration, avoiding costly extermination and repair expenses. Equipment longevity increases when moisture and debris are kept away from fan motors and electrical components. Home value appreciation occurs as energy-efficient improvements become increasingly important to buyers.
When Weather Seals Are Essential for Attic Solar Fans
Weather seals become critical in specific situations that increase air leakage risks. Homes with older construction often have settling that creates new gaps around installations over time. Climate extremes, including temperature swings exceeding 60°F seasonally, stress unsealed connections and cause materials to expand and contract. High-wind areas require additional sealing to prevent pressure differentials from forcing air through small openings.
Identifying Problem Areas That Need Immediate Sealing
Several indicators signal urgent need for weather seal installation or replacement. Visible light gaps around fan housing during daylight hours indicate significant air leakage potential. Temperature differences exceeding 5°F between rooms on the same floor suggest air infiltration issues. Increased energy bills during seasonal transitions often correlate with compromised sealing. Ice dam formation in winter frequently results from warm air leaking into attic spaces through unsealed penetrations. Professional energy audits can help identify these problems and quantify potential savings from improved sealing.
Critical Sealing Locations in Attic Installations
- Roof penetration points where fan housing meets roofing materials require primary sealing
- Mounting bolt locations need individual seal washers to prevent air infiltration paths
- Electrical conduit entry points should be sealed with appropriate weatherproof connectors
- Fan housing joints require gaskets to prevent air bypass around internal components
- Attic access panels need weatherstripping to maintain the thermal boundary
- Ductwork connections require sealed joints to prevent conditioned air loss
- Chimney and plumbing penetrations need compatible sealing materials for different applications
Selecting the Right Weather Seals and Installation Methods
Material selection significantly impacts sealing performance and longevity. Silicone seals offer superior temperature resistance and UV stability, making them ideal for exposed roof applications. EPDM rubber provides excellent compression characteristics and maintains flexibility across wide temperature ranges. Butyl tape delivers exceptional adhesion for permanent installations but requires surface preparation for optimal performance. Comprehensive comparison reviews help homeowners understand which materials work best for their specific climate and installation requirements.
Cost Considerations and Material Performance
Weather seal costs typically range from $2-8 per linear foot depending on material quality and application complexity. Professional installation adds $150-400 to total project costs but ensures proper technique and warranty coverage. DIY installations can save labor costs but require careful attention to manufacturer specifications and surface preparation. Price analysis tools available through trusted sources help homeowners budget appropriately while avoiding false economy from inferior materials that fail prematurely.
Who Should Install Attic Solar Fan Weather Seals
Several groups benefit most from attic solar fan weather seal installations. Energy-conscious homeowners seeking to reduce utility costs find that proper sealing provides measurable savings within the first year. DIY enthusiasts with basic construction skills can successfully complete installations using manufacturer guidelines and proper materials. New homeowners looking to improve efficiency often discover that sealing existing ventilation equipment provides excellent return on investment compared to major system replacements.
Skill Requirements and Professional vs DIY Installation
DIY installation requires basic tools including caulk guns, utility knives, and measuring devices, along with comfort working on roofs or in attic spaces. Professional installation becomes necessary for complex roof configurations, multiple penetrations, or when warranty requirements specify certified installers. Homeowners should honestly assess their skill level and safety comfort before attempting roof-mounted installations. Professional installation pros and cons help determine the best approach for individual situations and budget constraints.
Installation Considerations for Different Homeowner Types
- First-time buyers benefit from professional installation with warranties for peace of mind
- Experienced DIYers can save costs with proper preparation and quality material selection
- Elderly homeowners should prioritize professional installation for safety considerations
- Budget-conscious families can phase installations over time, starting with most critical areas
- Environmentally focused homeowners appreciate sustainable materials and long-term performance
- Investment property owners need durable solutions that minimize maintenance requirements
- Quality-focused consumers should research manufacturer reputations and warranty terms
Where to Apply Weather Seals for Maximum Effectiveness
Strategic seal placement maximizes air leakage prevention while minimizing material costs and installation complexity. Primary sealing locations include the roof penetration where the fan housing meets roofing materials, requiring flexible seals that accommodate thermal expansion. Secondary locations involve mounting hardware, electrical connections, and any ductwork interfaces that create potential air pathways. Understanding specific use cases helps homeowners prioritize sealing efforts for maximum impact.
Installation Techniques That Ensure Long-Term Performance
Surface preparation determines seal longevity and effectiveness more than material selection alone. Clean, dry surfaces free from oils, dust, and loose debris provide optimal adhesion for permanent seals. Temperature conditions during installation affect cure times and initial bond strength, with most materials performing best when applied between 40°F and 85°F. Regular maintenance schedules should include annual inspections of seal condition and immediate repairs of any compromised areas to maintain system effectiveness.
Common Installation Mistakes and How to Avoid Them
Several installation errors compromise weather seal performance and longevity. Insufficient surface cleaning prevents proper adhesion, leading to premature seal failure within 2-3 years instead of the expected 10-15 year lifespan. Over-compression of foam seals reduces their ability to maintain contact pressure as materials age and lose elasticity. Under-application of sealant creates gaps that allow air infiltration, while over-application wastes material and creates messy appearances. Temperature-related mistakes include applying seals during extreme weather when materials cannot cure properly, and failing to account for seasonal expansion that can stress rigid connections.